THE QUICK VERSION
A basic turned mask uses outer fabric, lining and a strap. Follow your chosen pattern for layer order and seam allowance.
- Check the scale, cut the layers and position an untwisted strap.
- Stitch the perimeter, leaving the pattern’s turning opening.
- Turn, close the opening securely and inspect the fit.
Open all sewing steps and troubleshooting
To sew a basic sleep mask, prepare a correctly scaled pattern, cut an outer fabric and lining, add optional thin padding, position the strap between the fabric layers, sew around the perimeter while leaving a turning opening, clip the curved seam allowance where appropriate, turn the mask right side out, and close the opening securely.
This tutorial focuses on assembly. For template dimensions and scaling, use the sleep mask pattern and sizing guide; for fabric, lining, padding and strap choices, see Sleep Mask Materials Compared.
What do you need to sew a sleep mask?
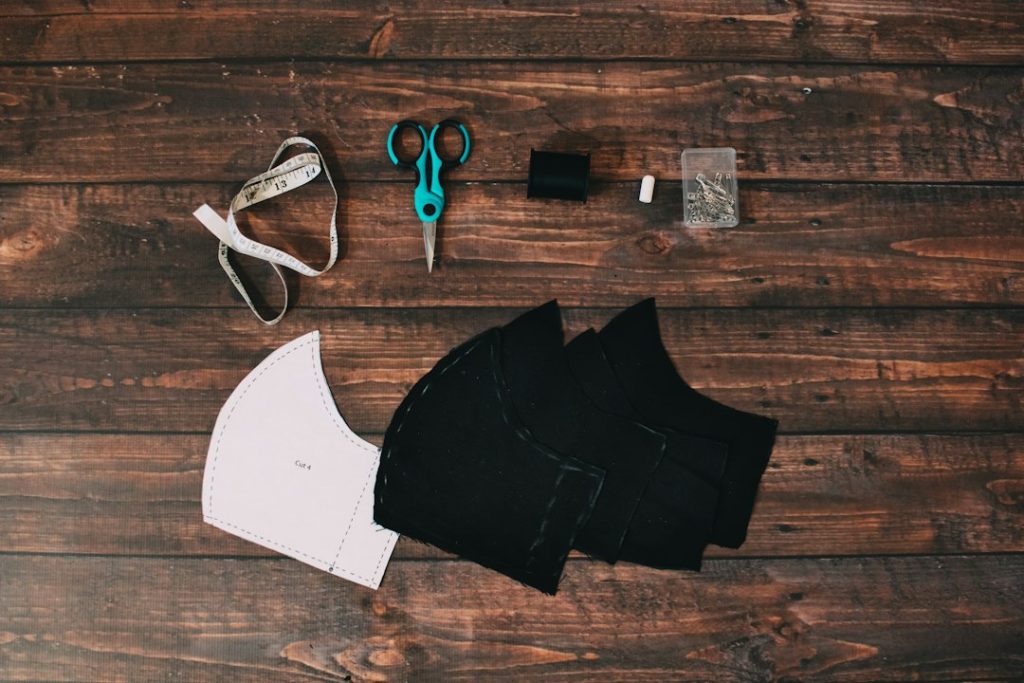
- A checked sleep mask pattern or template
- Outer fabric
- Face-side lining
- Optional thin batting or padding appropriate to the pattern
- Elastic or another pattern-compatible strap
- Thread
- Fabric-marking and cutting supplies
- Pins or clips
- A sewing machine or needle for hand sewing
Exact quantities and seam allowances depend on the pattern. Follow the instructions for the materials and equipment you are using rather than assuming every fabric behaves the same way.
1. Check the pattern before cutting
Confirm the print scale, finished coverage and whether seam allowance is already included. A paper test can reveal problems around the nose, temples or strap position before you cut the final fabric.
If you are starting from scratch, the How to Make a Sleep Mask hub explains where pattern, materials, construction, fit and care belong in the complete DIY process.
2. Cut and label the layers
Transfer the pattern accurately to the required layers. Keep track of the outer fabric and the lining, especially when their wrong and right sides are not obvious. If the design uses batting or padding, cut it according to the pattern rather than automatically treating it as an identical extra fabric layer.
3. Check the strap position before sewing
Place the strap at the side attachment points specified by the pattern and confirm that it is not twisted. The strap ends usually need to be captured securely by the seam while most of the strap remains safely away from the perimeter being stitched.
Do not use an excessively short strap to correct a mask that does not fit its intended shape. Pattern geometry and strap tension solve different problems.
4. Arrange the fabric layers
For a common turned construction, the visible fabric faces are arranged so they will appear on the outside after turning. The exact stack depends on whether padding is included and how the chosen pattern is designed, so verify the layer order before stitching the perimeter.
5. Sew around the perimeter and leave a turning opening
Sew with the seam allowance specified by your pattern, keeping the layers aligned and securing the strap ends where they meet the sides. Leave the designated section unsewn so the mask can be turned right side out.
Work slowly around curves and keep fingers clear of the moving needle. If you are new to a sewing machine, follow its manufacturer instructions and get appropriate supervision or instruction before operating it.
6. Prepare the curved seam for turning
Curved seams may need their seam allowance carefully managed so the finished edge can lie smoothly after turning. Follow the pattern instructions for trimming or clipping and avoid damaging the stitching line.
7. Turn the mask right side out
Use the opening to turn the project. Work the curved edges into shape gently rather than forcing them. Check that the strap is correctly positioned and that no unintended fabric or strap section has been caught in the perimeter seam.
8. Close the opening and finish the edge
Fold the opening’s seam allowance inward to follow the surrounding edge. Depending on the design, close it with suitable hand stitching or with the finishing/topstitching method specified by the pattern. Inspect the complete perimeter for loose areas before using the mask.
Can you sew a sleep mask by hand?
Yes. A simple fabric sleep mask can be hand sewn, so this does not require a separate pattern or a separate article. The same pattern, layer order and fit principles apply; the main difference is the stitching method and the additional time required.
Use secure, consistent stitches appropriate to the seam and close the turning opening neatly. The finished seam should hold the layers together without leaving hard or bulky areas against the face.
How do you keep the elastic from twisting?
Before sewing the second attachment point, trace the strap from one side to the other and confirm that it lies in the intended orientation. Keeping most of the strap gathered away from the perimeter also reduces the chance of accidentally catching it elsewhere in the seam.
Should you add batting to a sleep mask?
Batting is optional unless the pattern specifically requires it. A thin layer can add body, but extra thickness changes seam bulk and the way the mask sits around the nose and edges. See the materials guide before changing the padding specified by a pattern.
Flat vs contoured construction
A basic flat mask is generally simpler because its main layers follow a similar outline. Contoured masks require shaping intended to create eye clearance and should be assembled according to a pattern designed for that geometry. Our contoured vs flat sleep mask guide explains the design trade-offs.
Common sleep mask sewing mistakes
- Cutting before checking the pattern scale.
- Adding seam allowance twice—or forgetting it when the template excludes it.
- Twisting the elastic before securing the second end.
- Accidentally stitching the loose strap into another part of the perimeter.
- Closing the entire perimeter before leaving a turning opening.
- Using excessive strap tension to compensate for poor pattern fit.
- Adding padding without considering the resulting seam bulk.
What if you do not want to sew?
A genuine no-sew construction is a different method, not simply this tutorial with the stitching removed. Material choice and edge assembly need to suit the no-sew method. Vendixia’s dedicated How to Make a Sleep Mask Without Sewing guide covers that branch separately.
Check the finished fit
Once the mask is complete, check eye coverage, nose-area gaps, edge pressure, strap stability and whether the mask stays in place without excessive tension. For a broader fit checklist, see How to Choose a Sleep Mask That Fits.
Frequently asked questions
Is a sleep mask a beginner sewing project?
A basic flat sleep mask can be a manageable small project for someone learning sewing fundamentals, provided the pattern is clear and the person is comfortable using the required equipment safely.
Do you sew the elastic inside the mask?
In many turned fabric constructions, the elastic ends are secured at the side seams while the strap is positioned so it emerges correctly after turning. Follow the specific pattern because construction can vary.
Do you need a sewing machine?
No. A simple design can be hand sewn, although machine sewing is typically faster. Pattern accuracy, secure seams and a clean finish matter with either method.
Should you sew the pattern page and this tutorial as one process?
Use them together but keep their roles separate: the pattern guide handles template, scale and sizing; this tutorial handles assembly. That separation also makes it easier to diagnose whether a problem comes from fit or construction.
Next step
After construction, inspect the fit and review the care requirements of all layers. If you want an alternative that avoids sewing entirely, use the dedicated no-sew method rather than improvising changes to a sewn pattern.
Editorial note: This is general craft information. Follow the instructions supplied with your sewing equipment and materials.